Notebook Window
The Notebook window is a separate window receiving text information from
AlliGator, such as action summary and analysis results. The Notebook window can
be opened using the Windows:Notebook menu item or the Ctrl+N
keyboard shortcut. Closing the window doesn’t lose its content, unless
AlliGator is closed as well (see below)
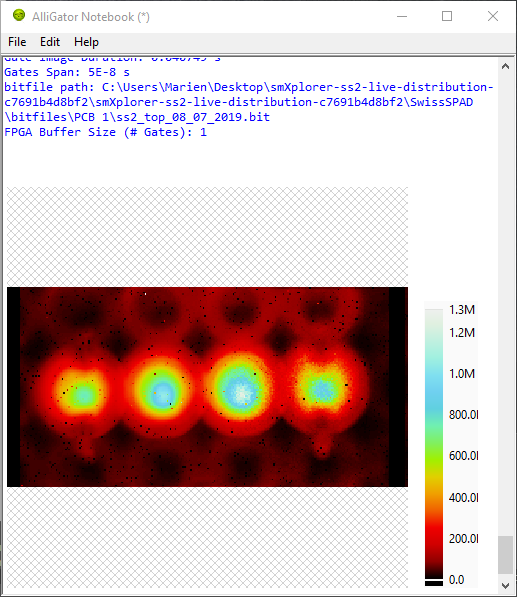
The main component of the Notebook is a Rich Text Box, which can contain images pasted from the clipboard or other similar objects. Naturally, the user can type text, edit the content of the Notebook with standard shortcuts and a few formatting options accessible via the right-click menu.
.
A list of available shortcuts can be accessed using the Help:Show Notebook
Shortcuts menu of the Notebook window.
When the Verbose Mode option (Settings:Miscellaneous window) is
checked, individual analysis steps (usually hidden from the user) are reported
in the Notebook in a specific style (light gray font in the default Light
Theme.
When the Verbose Error Mode option (Settings:Miscellaneous window) is
checked, error messages (also usually hidden from the user) are reported in red
font (in both the Light and Dark theme). While this can generate a lot of
unwanted information, it is easy to delete afterwards and is useful for
debugging purposes.
Notebook Styles & Themes
AlliGator is using 6 different styles to display messages in the Notebook:
Message
Result
Error
Setting
Verbose
Warning
This allows easily identifying the type of messages based on their style in the
Notebook. Styles can be modified within a Theme. There are two default
themes, accessible via the Styles menu:
Light Theme (white page)
Dark Theme (black page)
Switching from one style to the other does not update previously output text, so it is preferable to choose which theme to use at the beginning of a session.
Editing Themes
Styles and Themes can be edited (but the Light and Dark Theme cannot) using the
Styles:Edit Text
Styles
menu item, which opens the following dialog window:
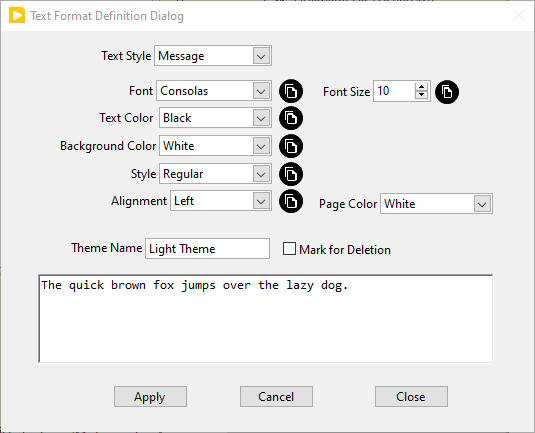
.
The currently edited Theme is displayed above the text box (Theme Name). The currently edited Style within that Theme is listed at the top (Text Style). The different characteristics of that style are indicated below:
Font
Font Size
Text Color
Background Color
Style
Alignment
Page Color is a Theme characteristic.
The Copy button next to each characteristic can be pressed to indicate that all Styles should use that same characteristic (for instance the Font).
Any change to any of the style characteristics is reflected immediately in the Text Example box.
Once all the Styles have been updated, the corresponding new Theme can be stored
by pressing on the Apply button. If the edited style is one of the default
ones (Light or Dark Theme), the dialog will require the user to enter a different
name for the Theme to be stored under. If the Theme is one of the user-defined
ones, it will be updated. Newly defined Themes will be listed under the Light
and Dark Theme in the Styles menu.
The Cancel button will restore the Theme’s Styles as they were when opening the window (but won’t revert the modifications if the Theme was stored with the Apply button).
The Close button will close the Dialog window and return to the Notebook.
To delete an existing (non-default) Theme, edit it with the Styles:Edit Text
Styles menu item and check the Mark for Deletion checkbox off and close the
Dialog window.
Saving & Loading Themes
The defined Themes can be saved and loaded using the Save Themes and Load
Themes menu items of the Styles menu. This uses .json files to store the
definitions of all themes (including the Light and Dark Themes).
Saving & Loading the Notebook
The Notebook is backed-up at regular intervals, as indicated in the bottom
message box. The backup file can be found in the
C:\Users\Username\AppData\Local\Temp folder, where Username is the
Windows login name. Note that this folder might be set to be invisible by
default [1].
The file name is of the form ~AlliGator Notebook ProcessID.rtf, where
ProcessID is the ID number of the AlliGator.exe process as found in the
Task Manager. This means that when two AlliGator copies are running, their
respective Notebook’s backup are identifiable by the ProcessID suffix. This
backup can be useful in case the user forgets to save the Notebook before
quitting, or in case of an application or computer crash.
It is strongly recommended to save the Notebook before quitting using the
File:Save or File:Save As... menu item. The Notebook contains important
information about the different analyses that have been performed. If the
Notebook has already been saved once during a session, using Save will
overwrite the previously saved file.
To save the current Notebook content in a different file, use the
Save As... option instead.
A reminder to save the Notebook is provided when quitting AlliGator, even if the Notebook has already been closed. If the Notebook is still open when AlliGator is closed, the user can still modify the Notebook and save it after AlliGator’s main window is closed. In other words, quitting AlliGator does not close the Notebook, but it also doesn’t save it.
It is also possible to load a previous Notebook using File:Open. A dialog
will remind the user that doing so will overwrite the current content of the
Notebook.
Tip
It is recommended to take advantage of the Notebook to insert annotations,
paste intermediate plots or images and in general keep track of user workflow.
Saving the Notebook at the end of an analysis session provides a convenient
record of analysis steps and parameters used during analysis, which goes a
long way in ensuring reproducibility. It can also be useful to print the
settings used during analysis using the Settings:Export Settings to Notebook
menu.
Notes